Creating a Proposal
Kuali Research Quick Start Guide: Creating a Proposal
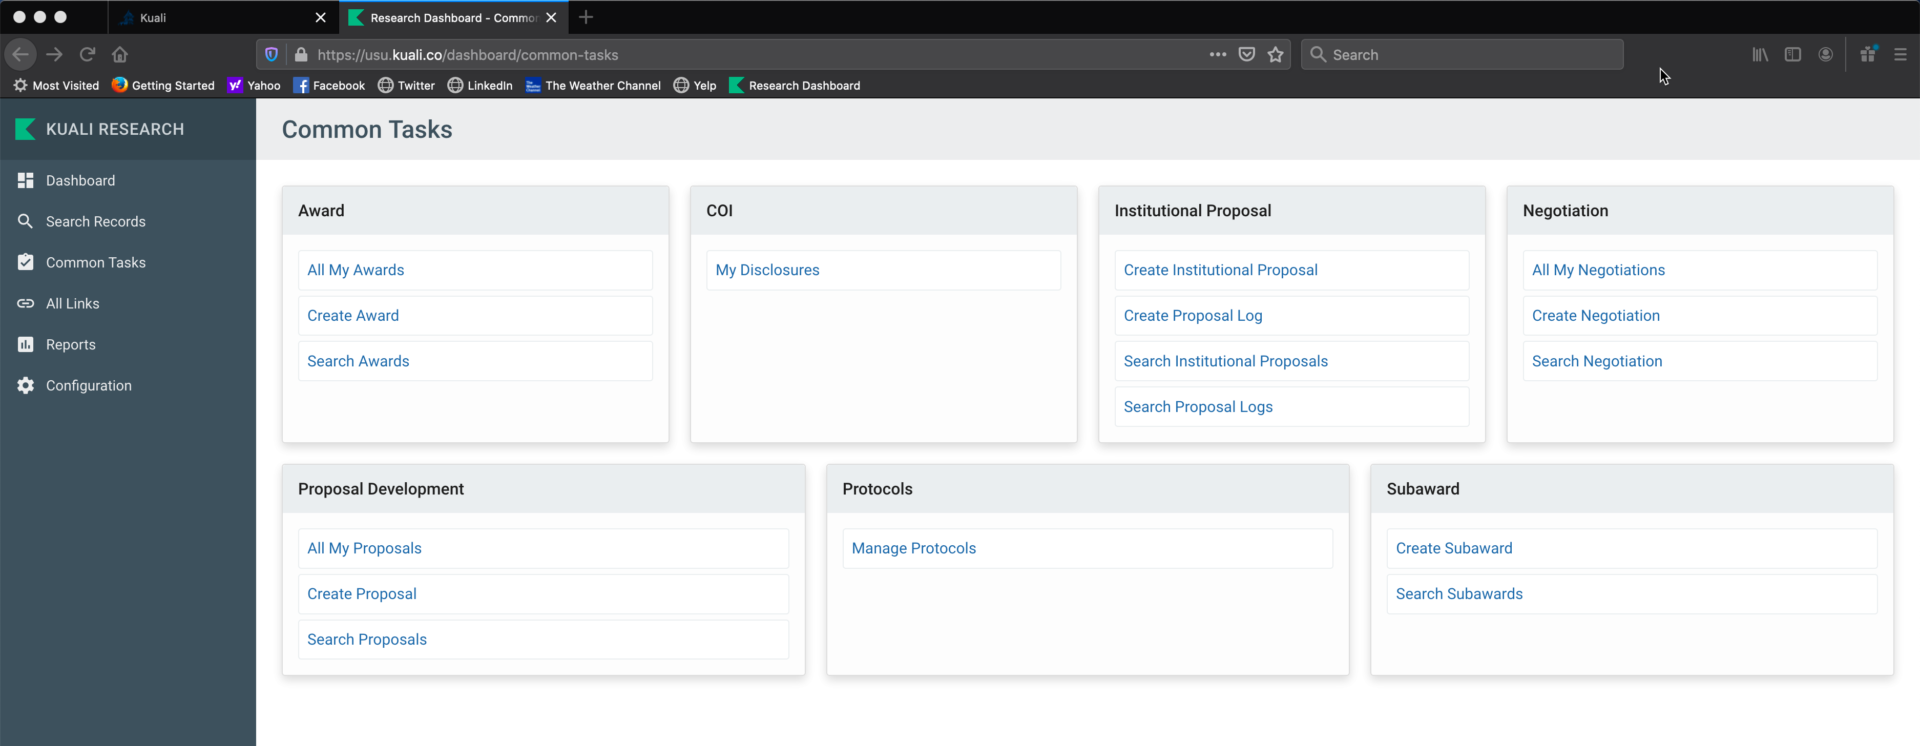
Step 1:
Under the Common Tasks Menu find the Proposal Development card and click Create Proposal.
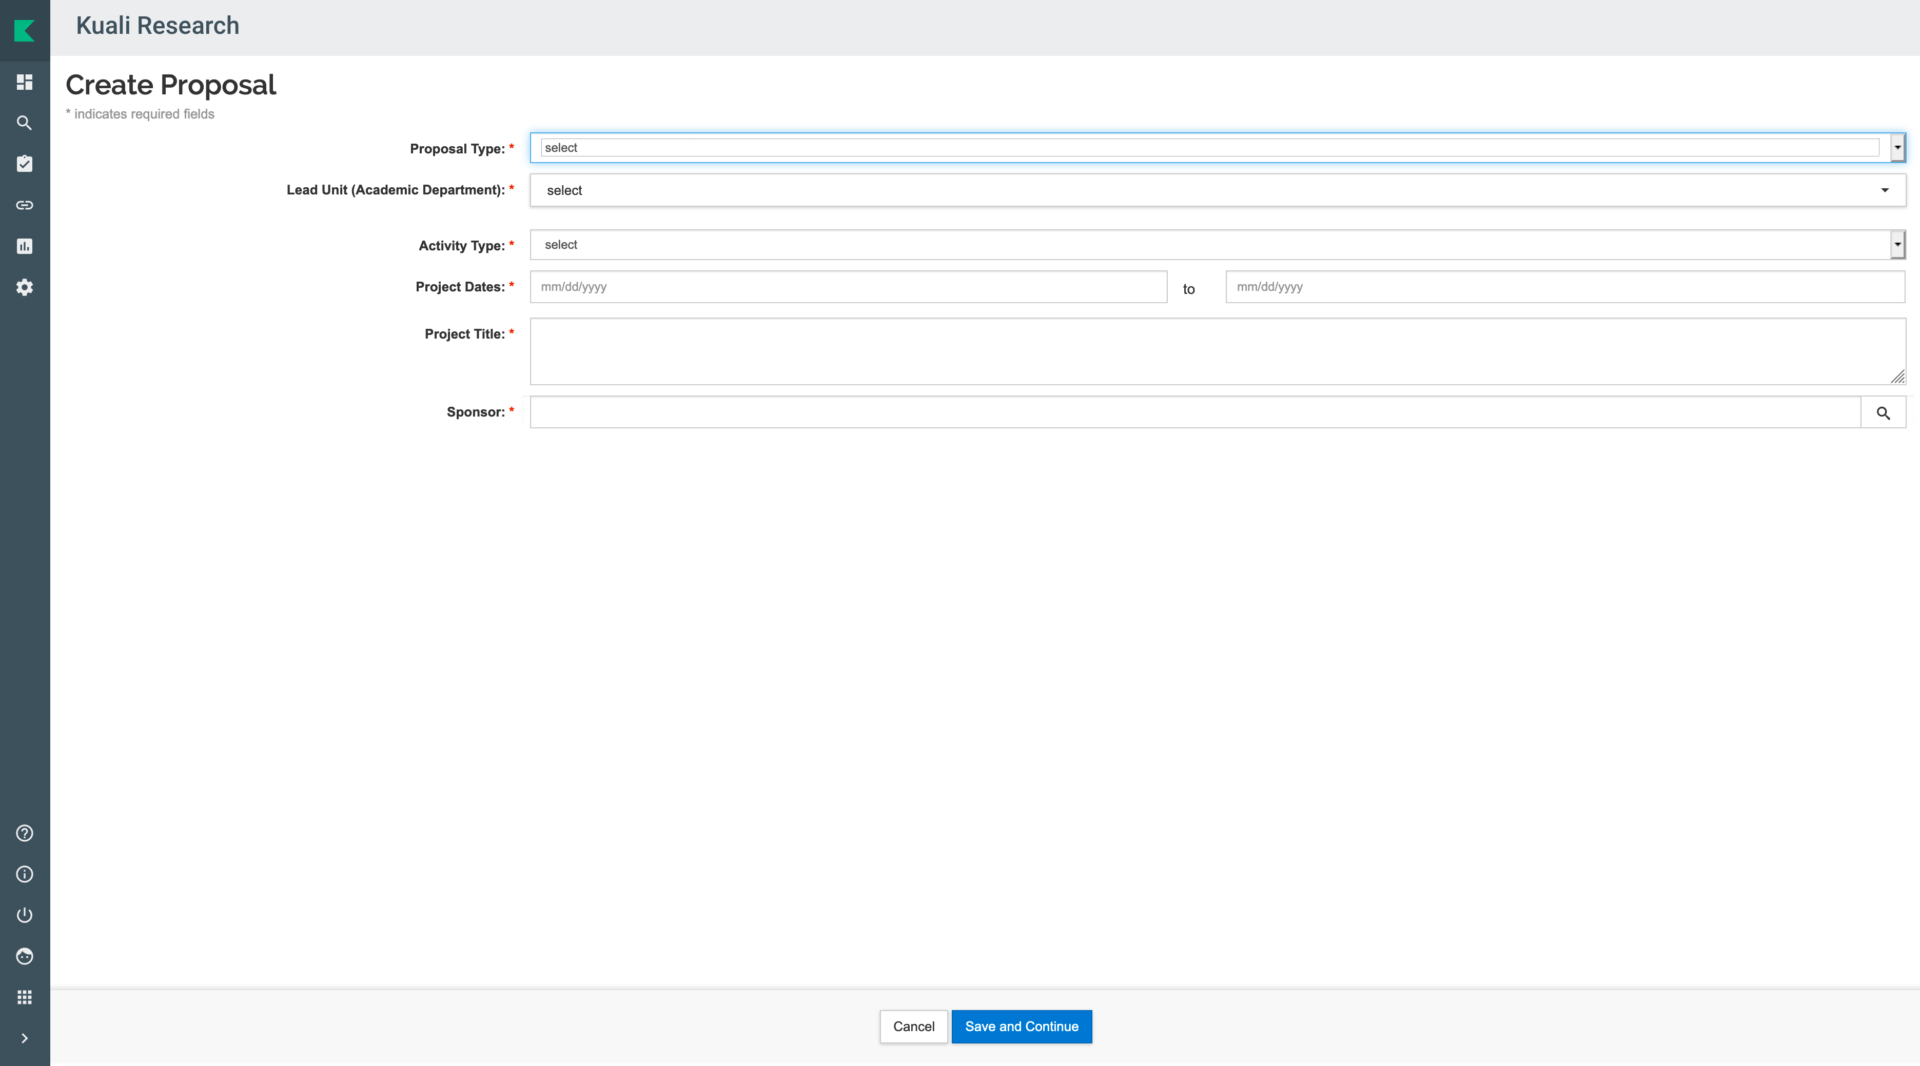
Step 2:
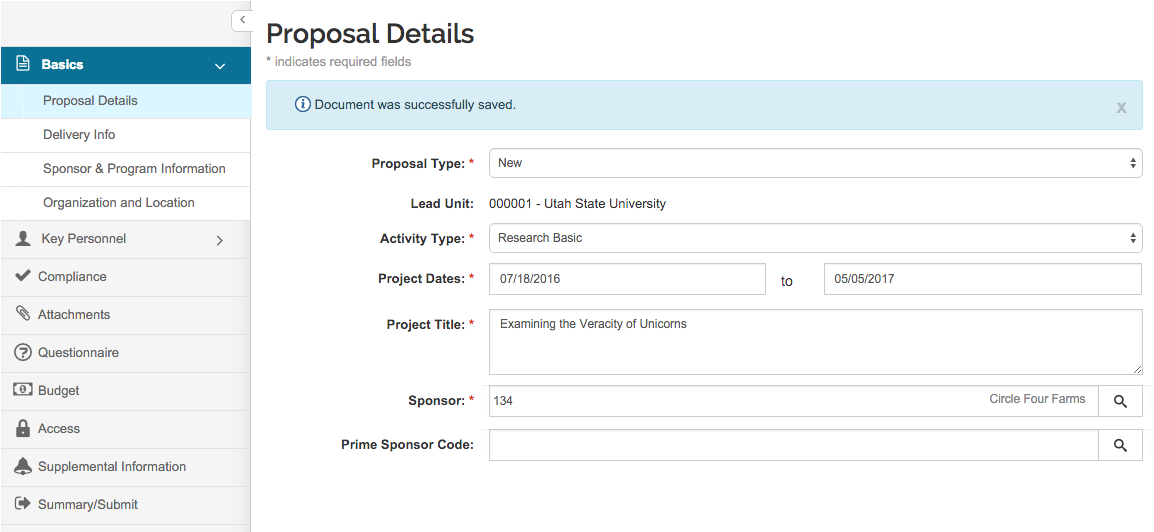
Fill in the Proposal General Information:
- Proposal Type
- Lead Unit
- Activity Type
- Project Start Date
- Project End Date
- Project Title
- Sponsor code (use
Look up to find your Sponsor)
Click the ‘Save and Continue’ button at the bottom of the screen.
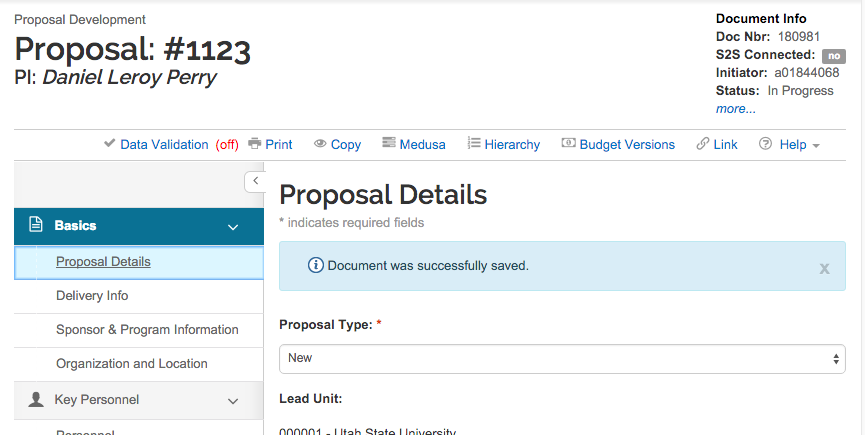
Your document now has a Proposal Number. You may want to note this number for future reference.
Step 3:
Add the prime sponsor code if there is flow through funding.
The Prime Sponsor is the originating sponsor.
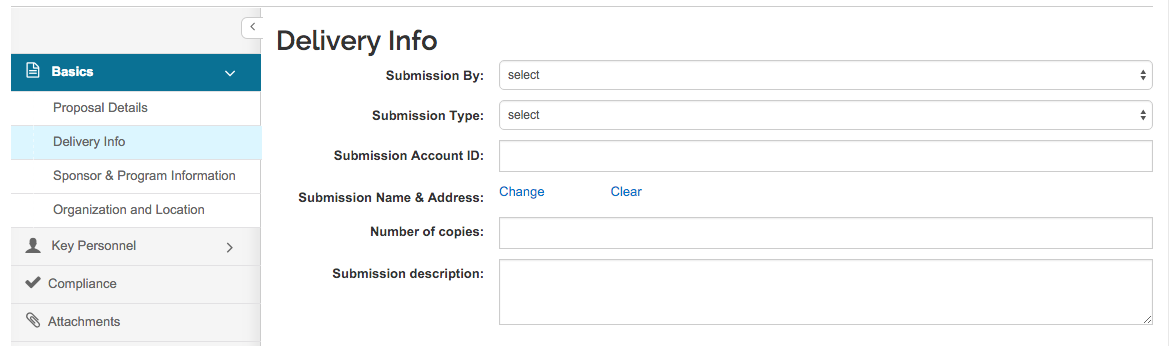
Step 4:
Choose submission type from the drop down (email, hard copy, or electronic).
In the submission description enter the email or hard copy address information.
Step 5:
Open ‘Sponsor & Program Information’ panel on the left:
a: Complete the Sponsor Deadline Date and Deadline Type
b: Choose the Notice of Opportunity if known
c: Enter the Opportunity ID and CFDA Number if known
d: Make sure to check the subawards check box if there will be subs on this proposal
e: Make sure the subrecipient commitment form is attached to this proposal (This can be done in the attachments section)
f: Choose the correct Anticipated Award Type
g: Click ‘Save and Continue’
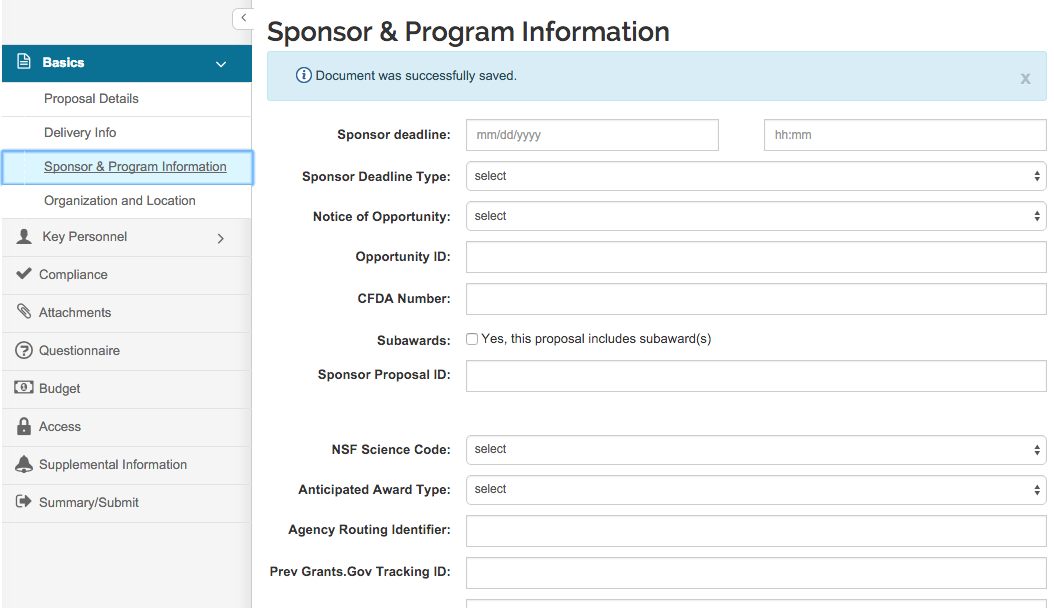
“You do not need to fill out these fields:”
“Sponsor Proposal ID”
“NSF Science code”
“Agency Routing Identifier Prev Grants.Gov Tracking ID”
“For most proposals the organization and Location tab does not need any edits”
Step 6:
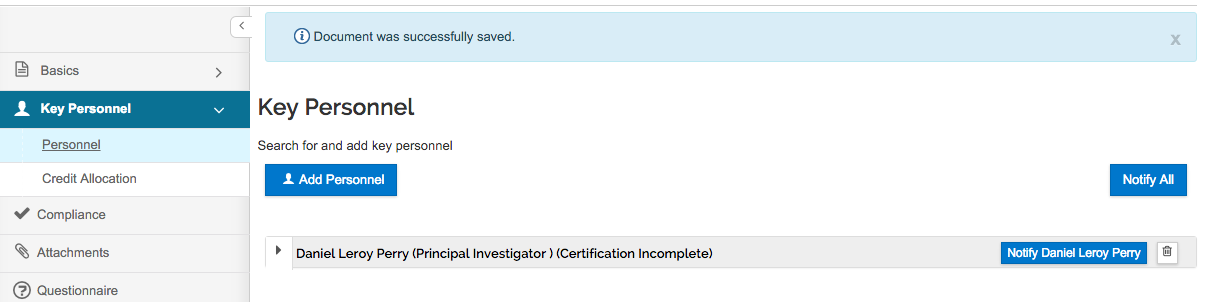
Open the ‘Key Personnel’ panel and then open the ‘Personnel’ tab.
Click the ‘Add Personnel’ button.
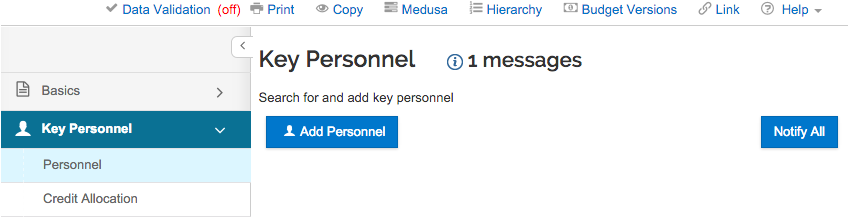
Search for and add key persons to your proposal (at least the PI must be entered).
Use Employee or Non-Employee Search to identify Key Personnel (return value for person).
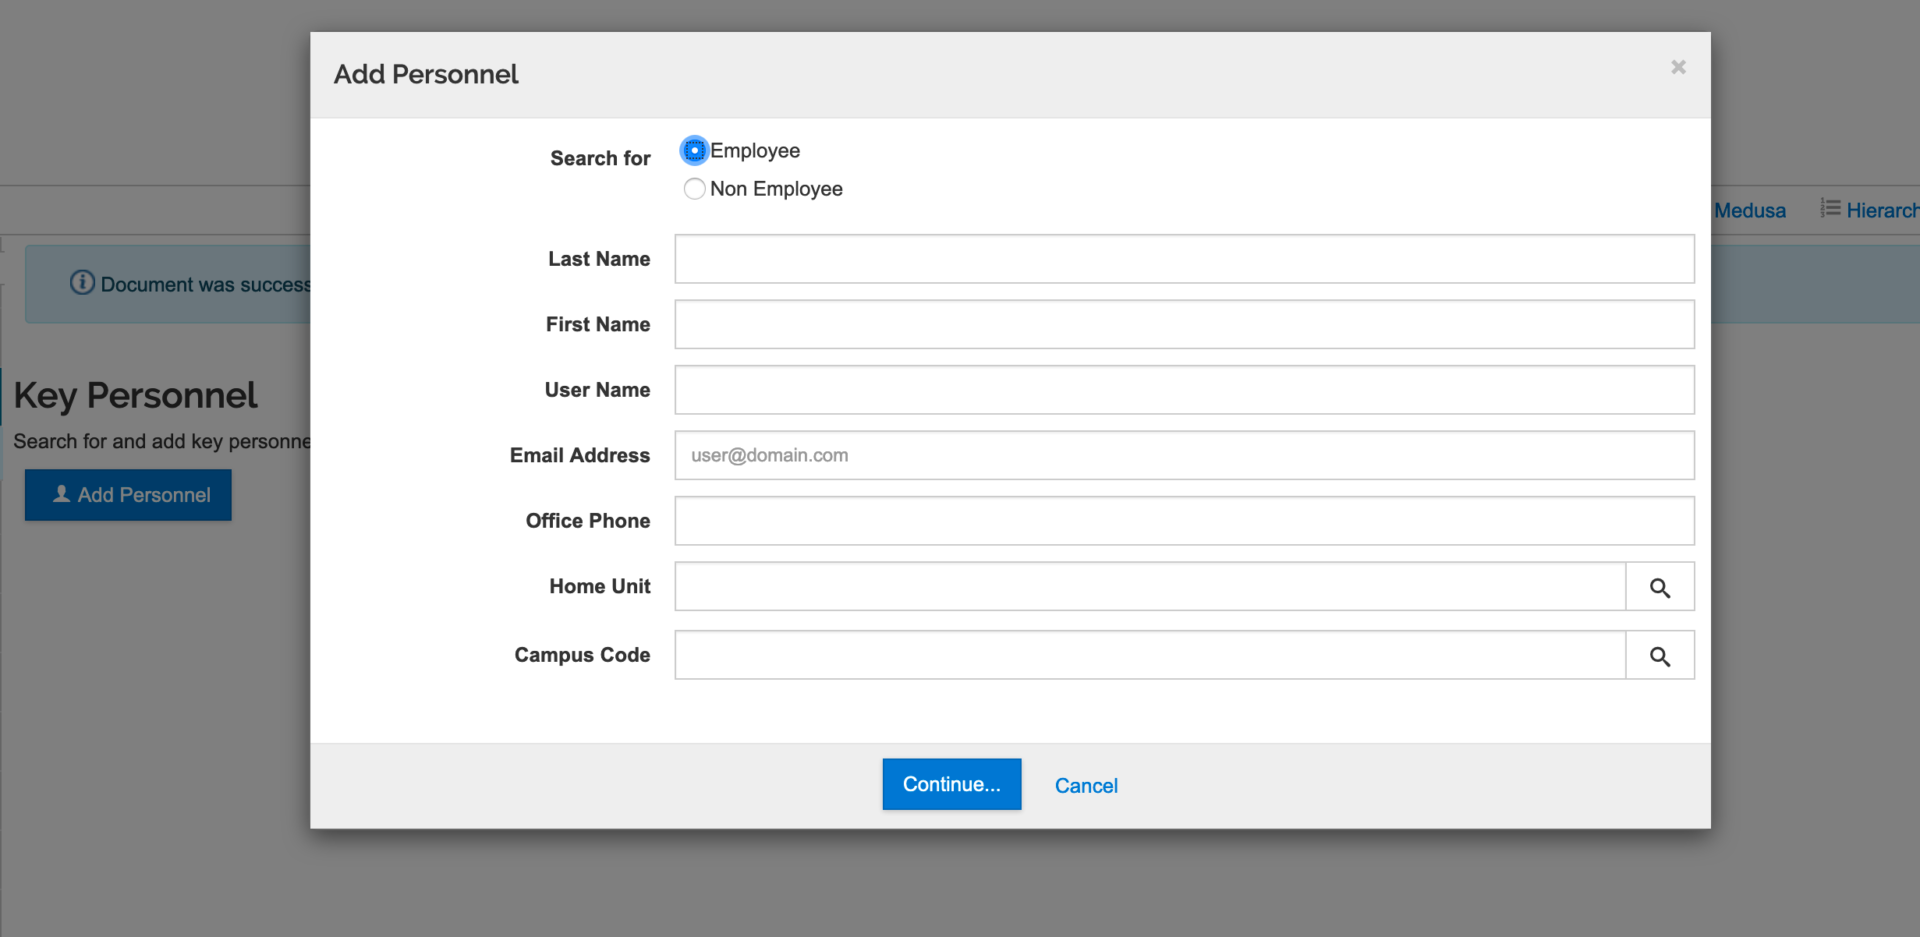
Note that this is a search screen and not something that needs to be filled out completely.
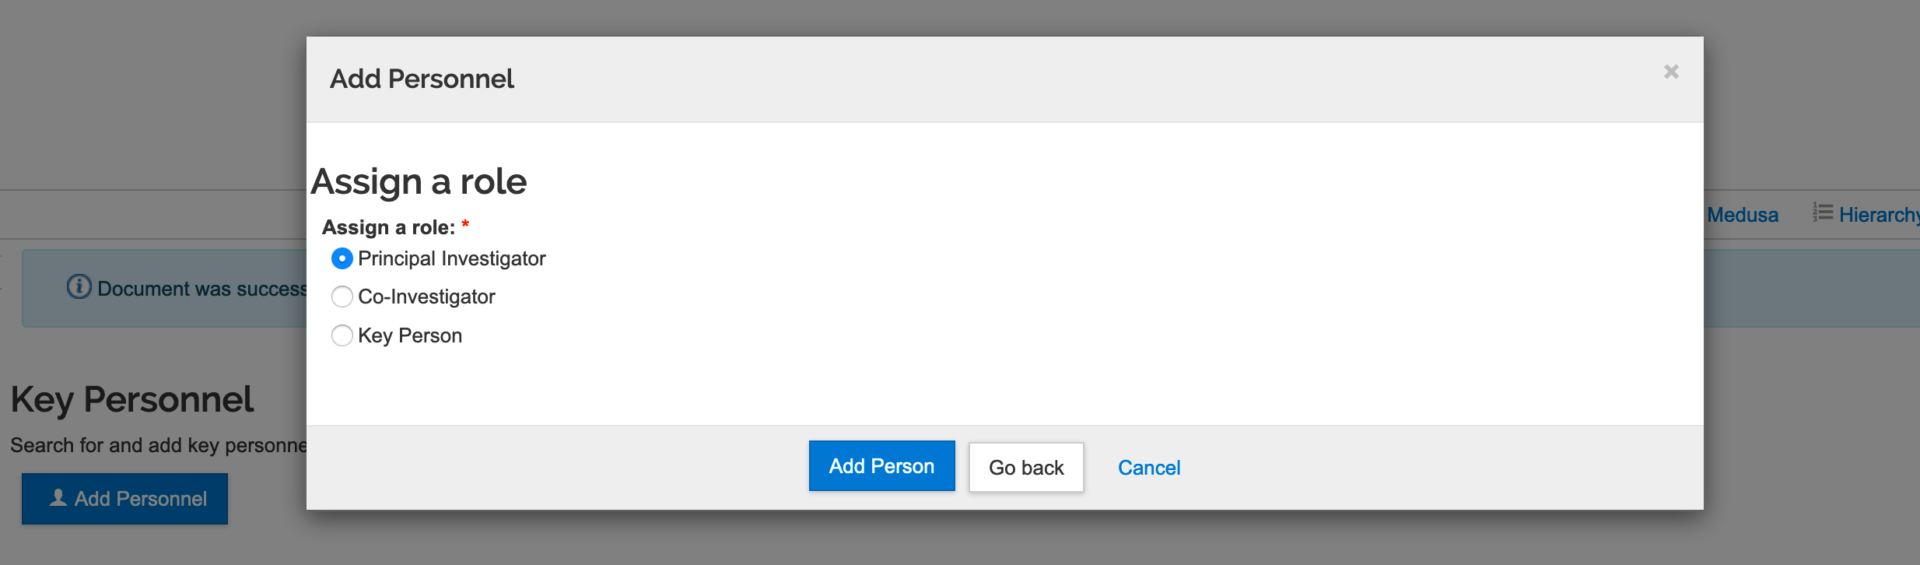
Identify proposal role (PI, Co-PI; Key Person).
Click on ‘Add’ Person.
‘Show’ the person’s details by clicking the arrow next to their name.
Review each tab to verify the details are correct (this data is pulled from banner, but because of multiple appointments, sometimes incorrect data is pulled).
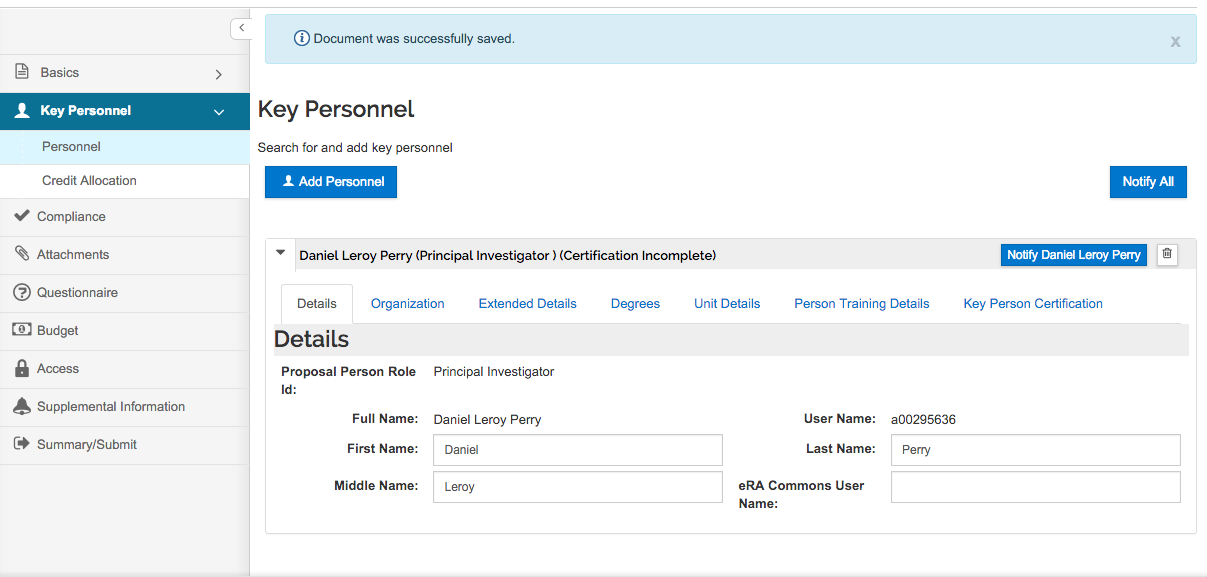
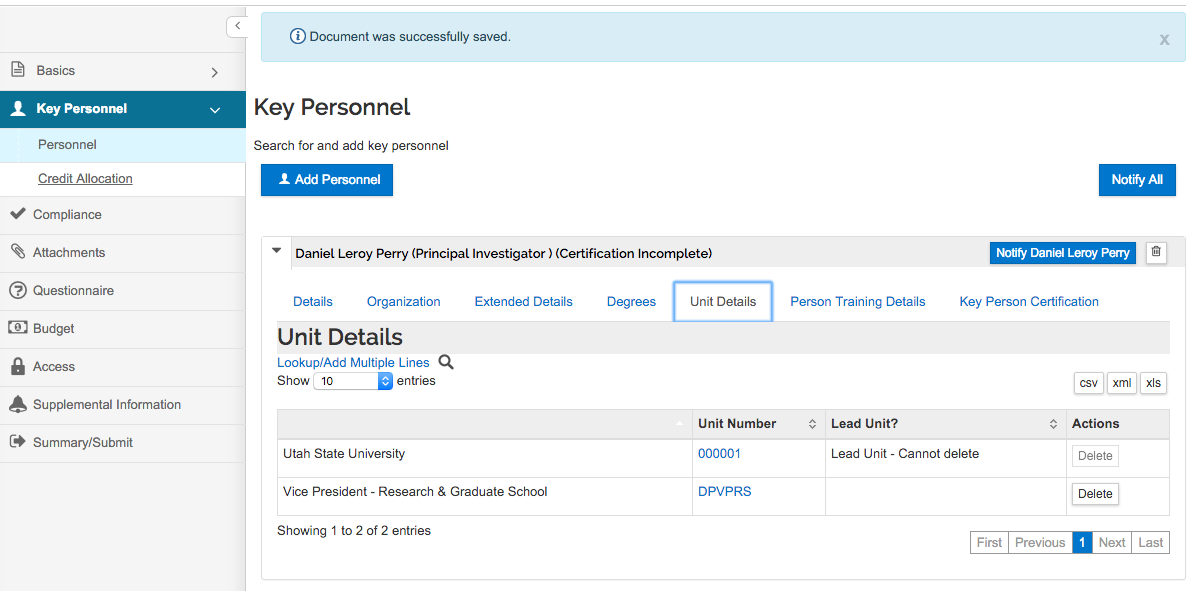
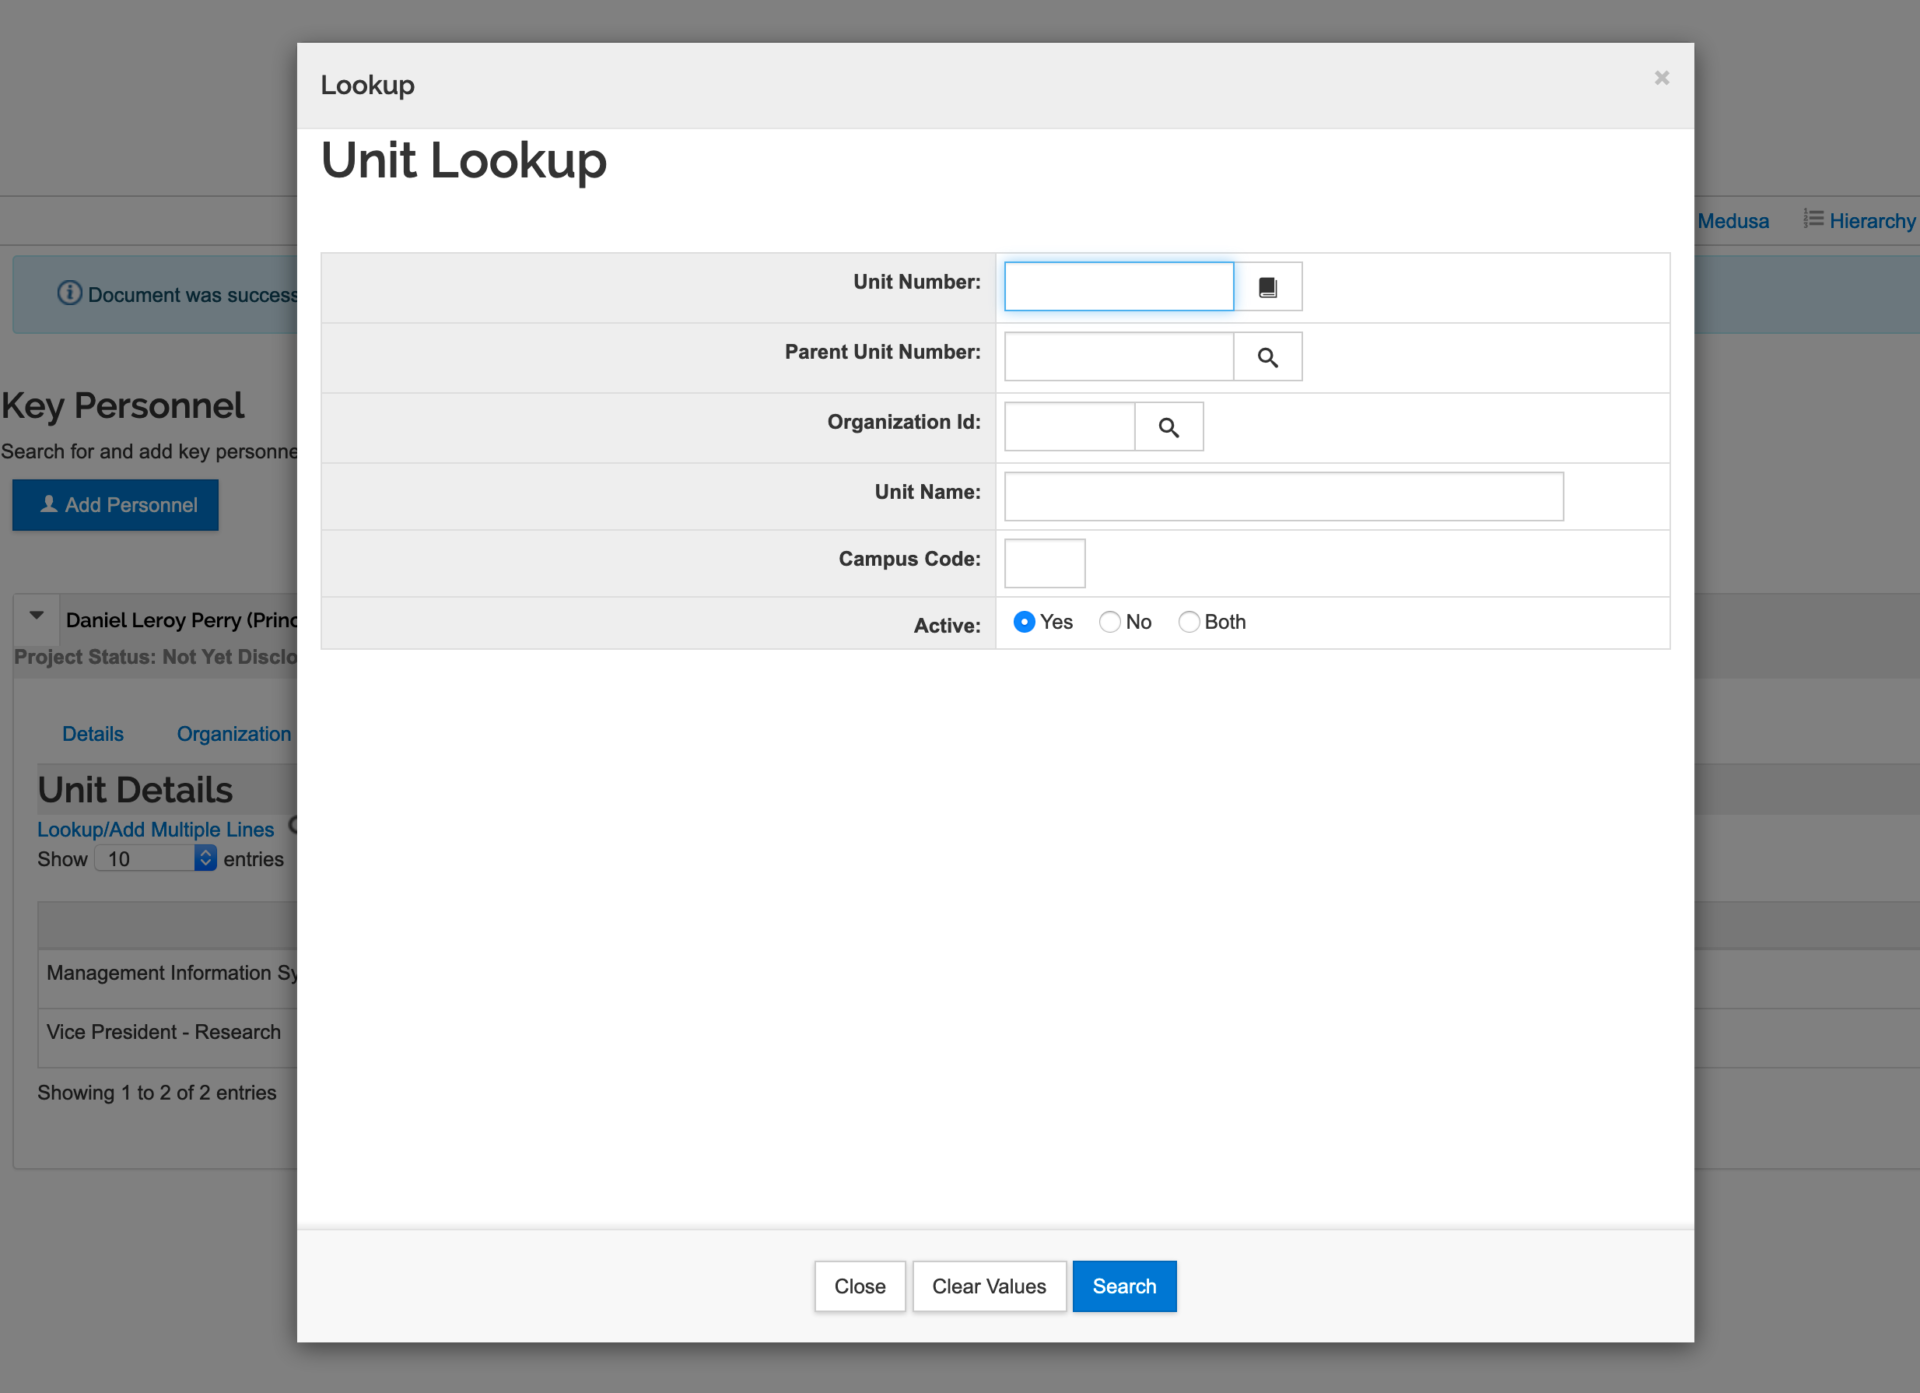
Under the Unit Details tab, additional units can be added, such as research centers.
To add additional units, click the Lookup/Add Multiple Lines link under the title, Unit Details.
In the pop-up search screen, search for ‘unit.’ Remember, you can use (*) for wild card searching.
‘Save and Continue.’
Step 7:
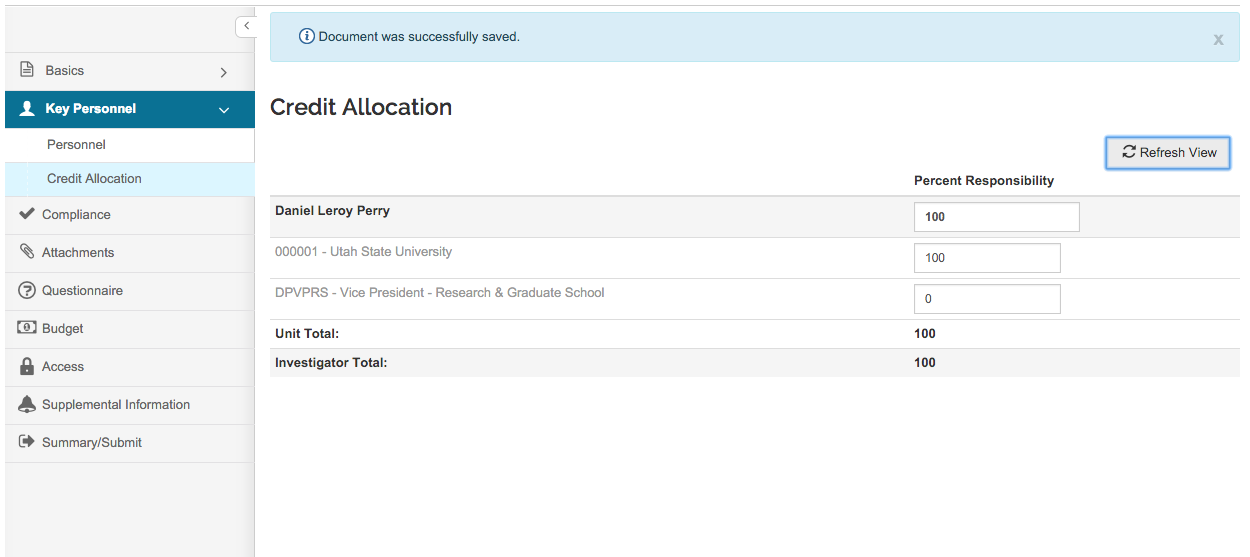
Enter the responsibility of each investigator so that the percentage adds up to 100%.
Enter the responsibility of each unit for each investigator. These percentages also need to equal 100% for each unit.
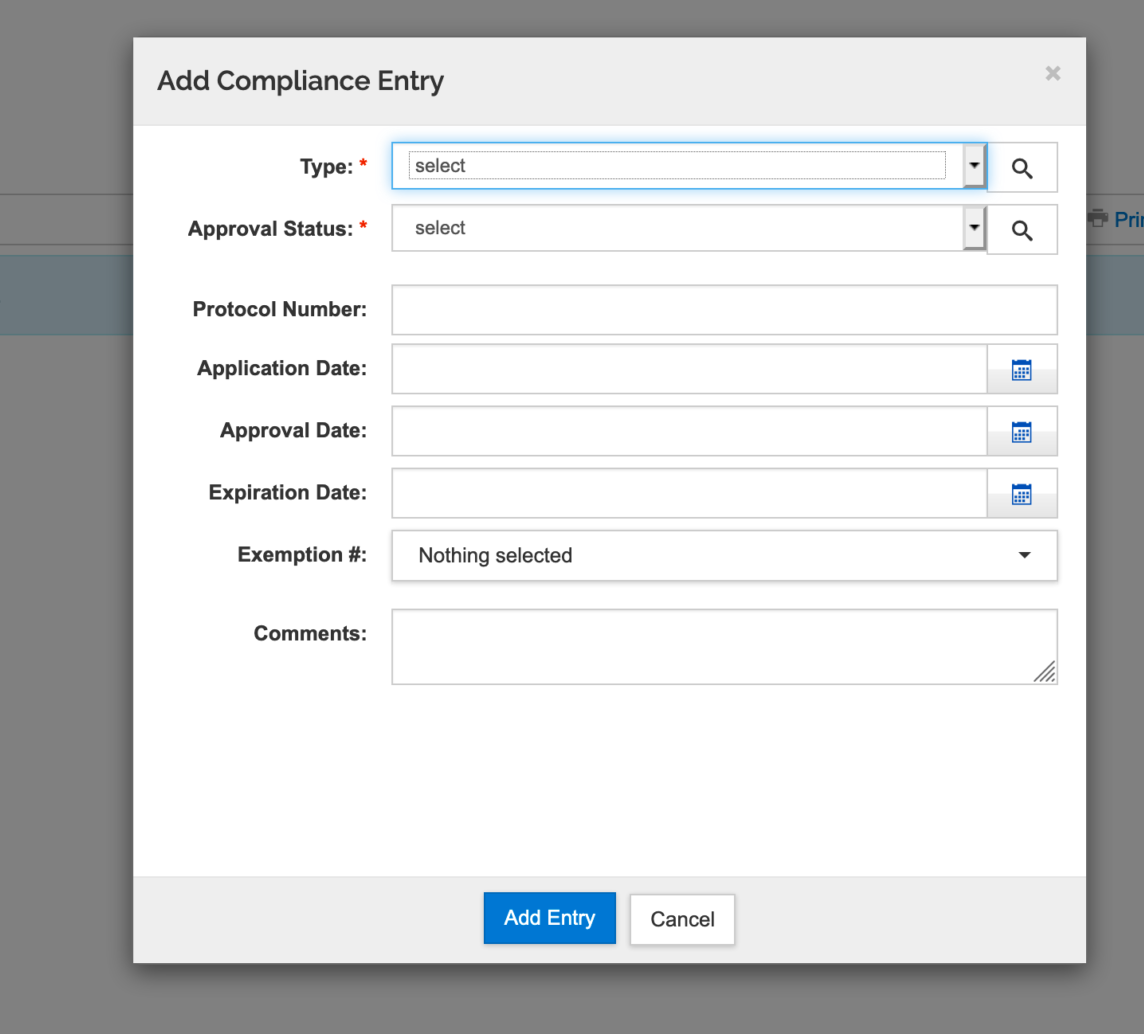
Step 8: Compliance
Click on the ‘Add compliance entry’ button.

Select the ‘Approval Status.’
Click ‘Add Entry’ (on the bottom of the screen).
‘Save and Continue.’
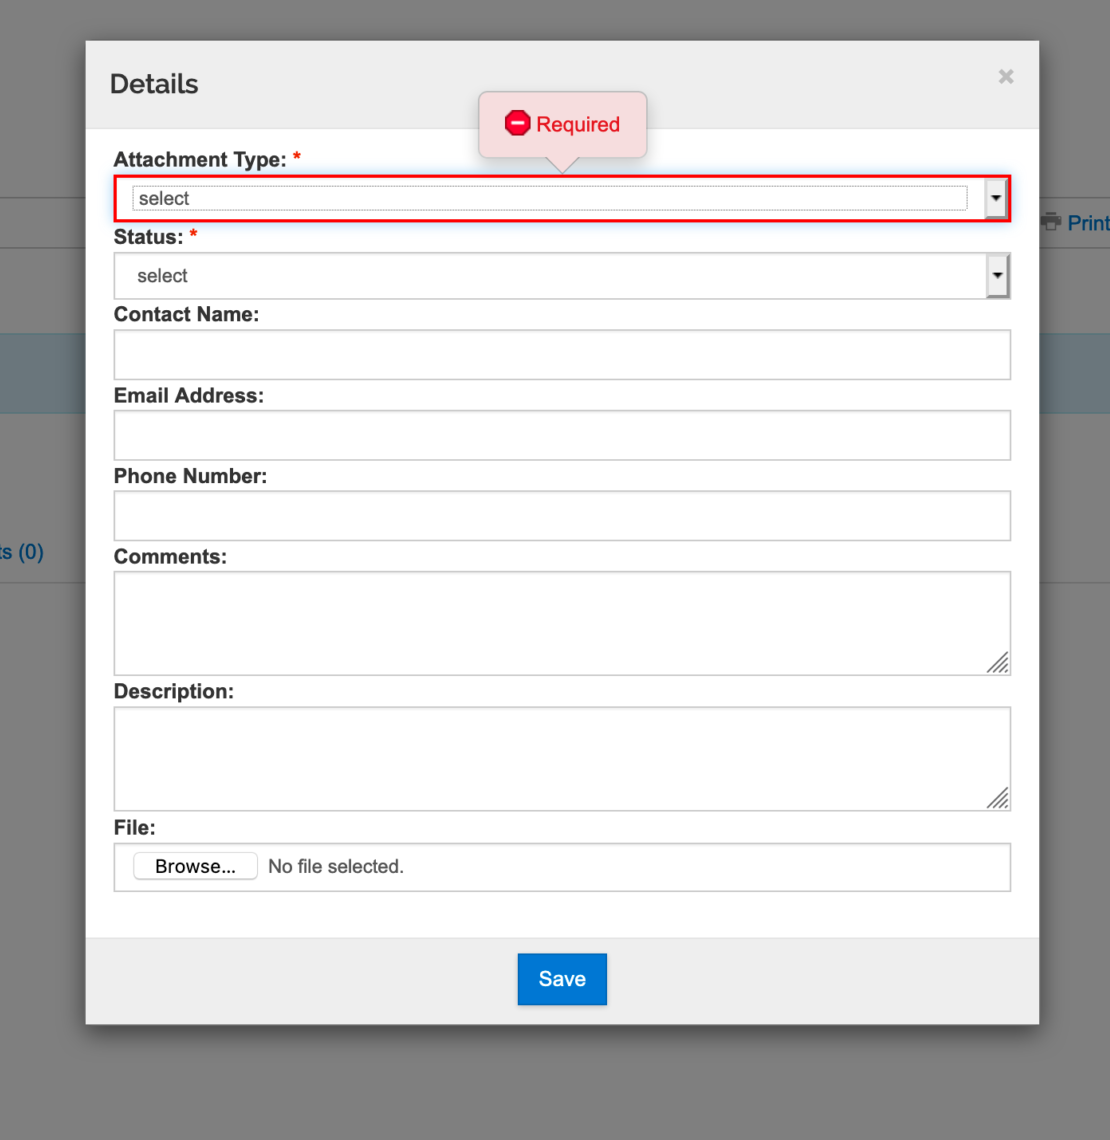
Step 9: Attachments
Upload documents related to the proposal.
Required Documents:
- Include all the documents required by the sponsor
- F&A Allocation Agreement template
- F&A waiver if there is an internal waiver of F&A
If you have a subaward upload the subrecipient commitment form under ‘Internal.’
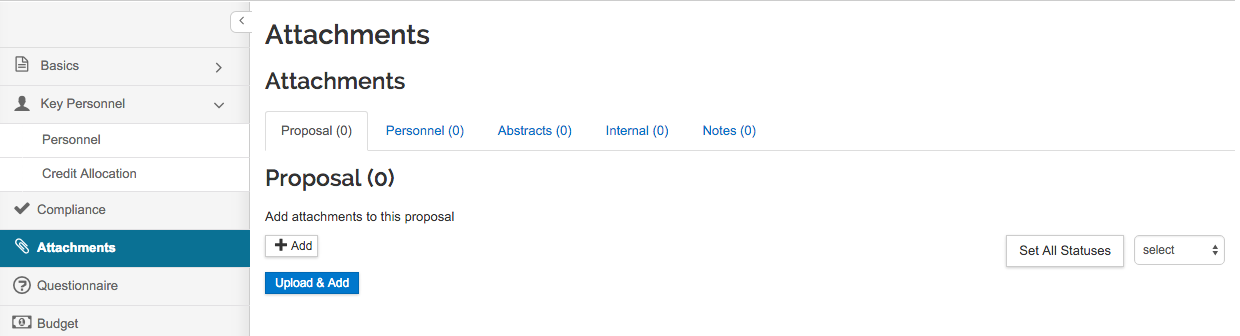
Each sub-recipient requires the following documents: Budget, budget narrative, statement of work
Select ‘Save’ and the ‘Save and Continue.’
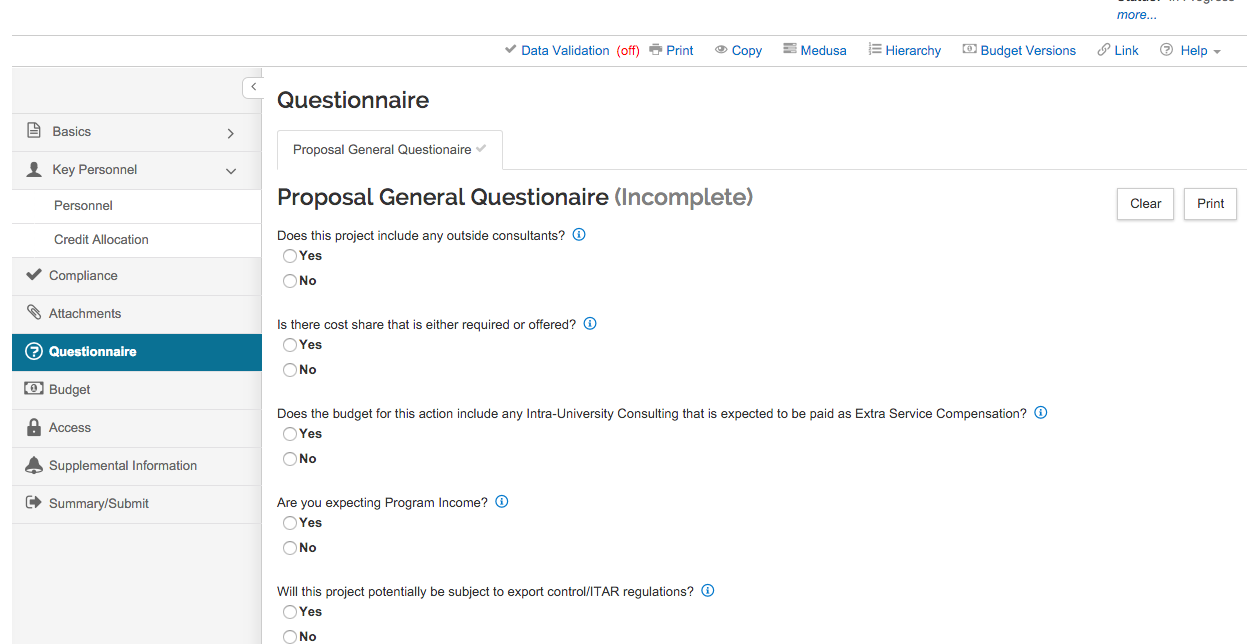
Step 10: Questionnaire
Note that some questions will require additional information depending on answers.
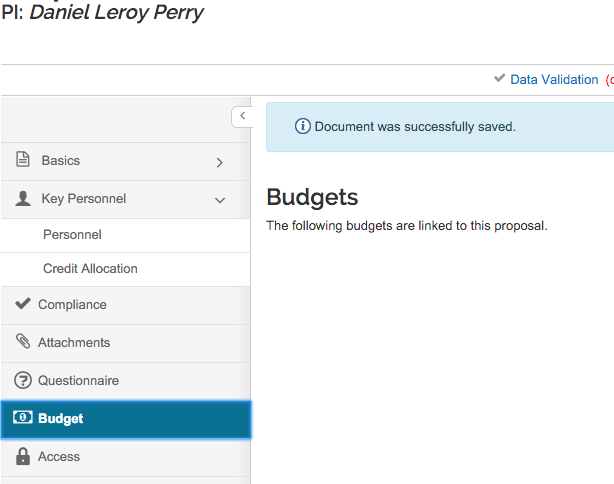
Step 11: Building a Budget
Directions can be found in the Budget Quick Start Guide.
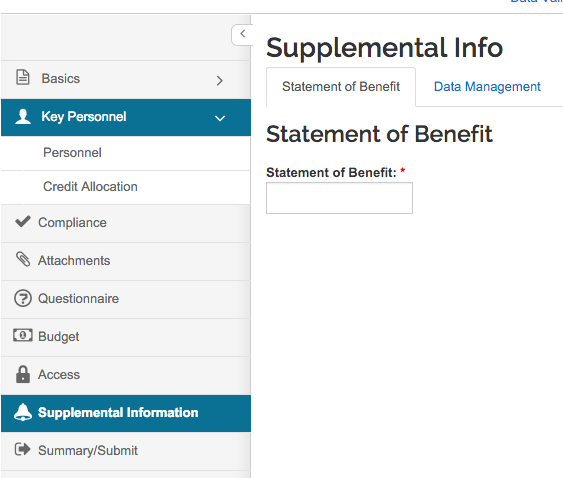
Step 12: Supplemental Info
Enter the Statement of Benefit.
This is the layperson’s description of the project.
Step 13: Summary/Submit
Review each tab to make sure that the proposal contains the correct information.
This is your last chance to make changes to the proposal before it is routed for approval.
Click ‘Submit for Review’ to send it into routing for approval and submission to sponsor.
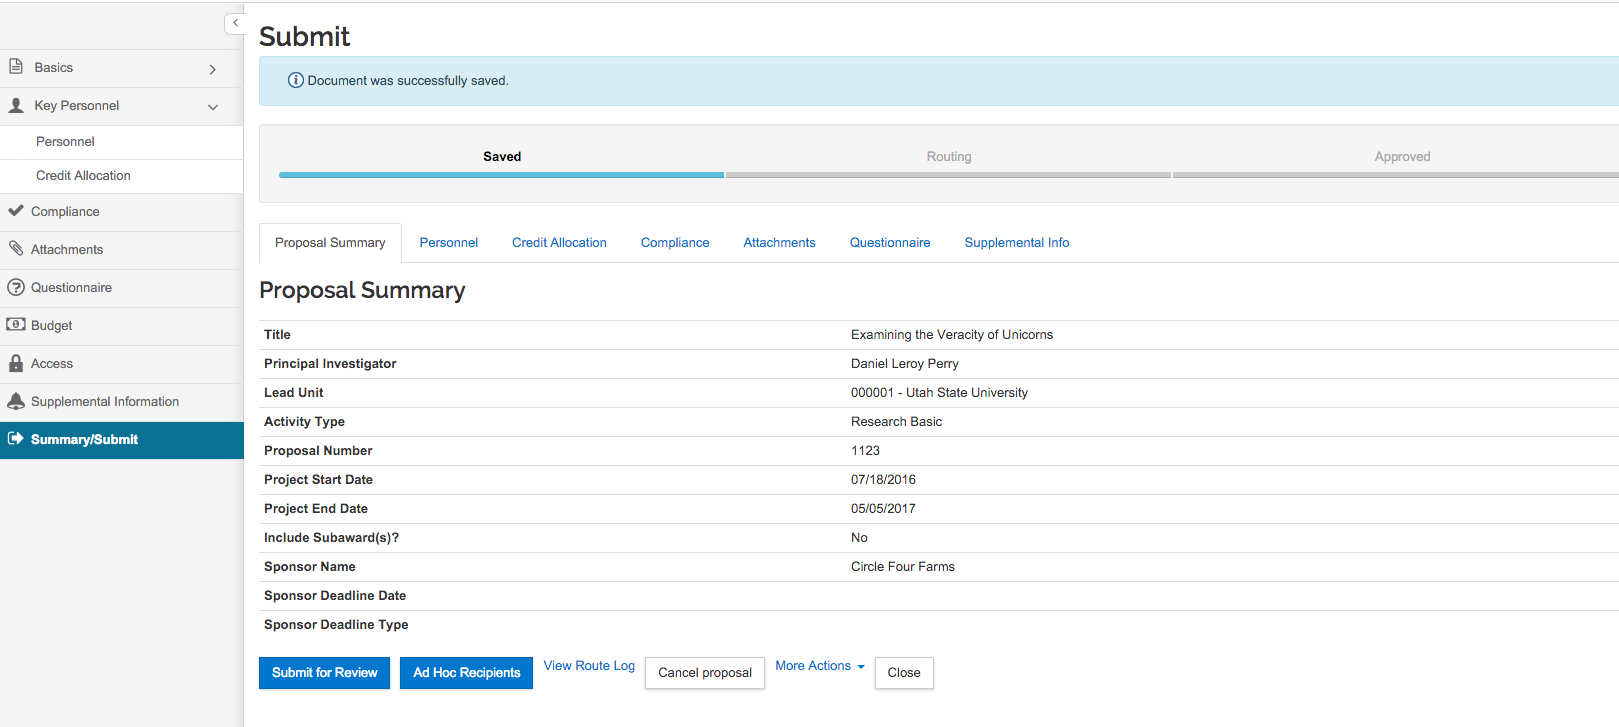
CONGRATULATIONS!
YOUR PROPOSAL HAS NOW BEEN SUBMITTED INTO ROUTING
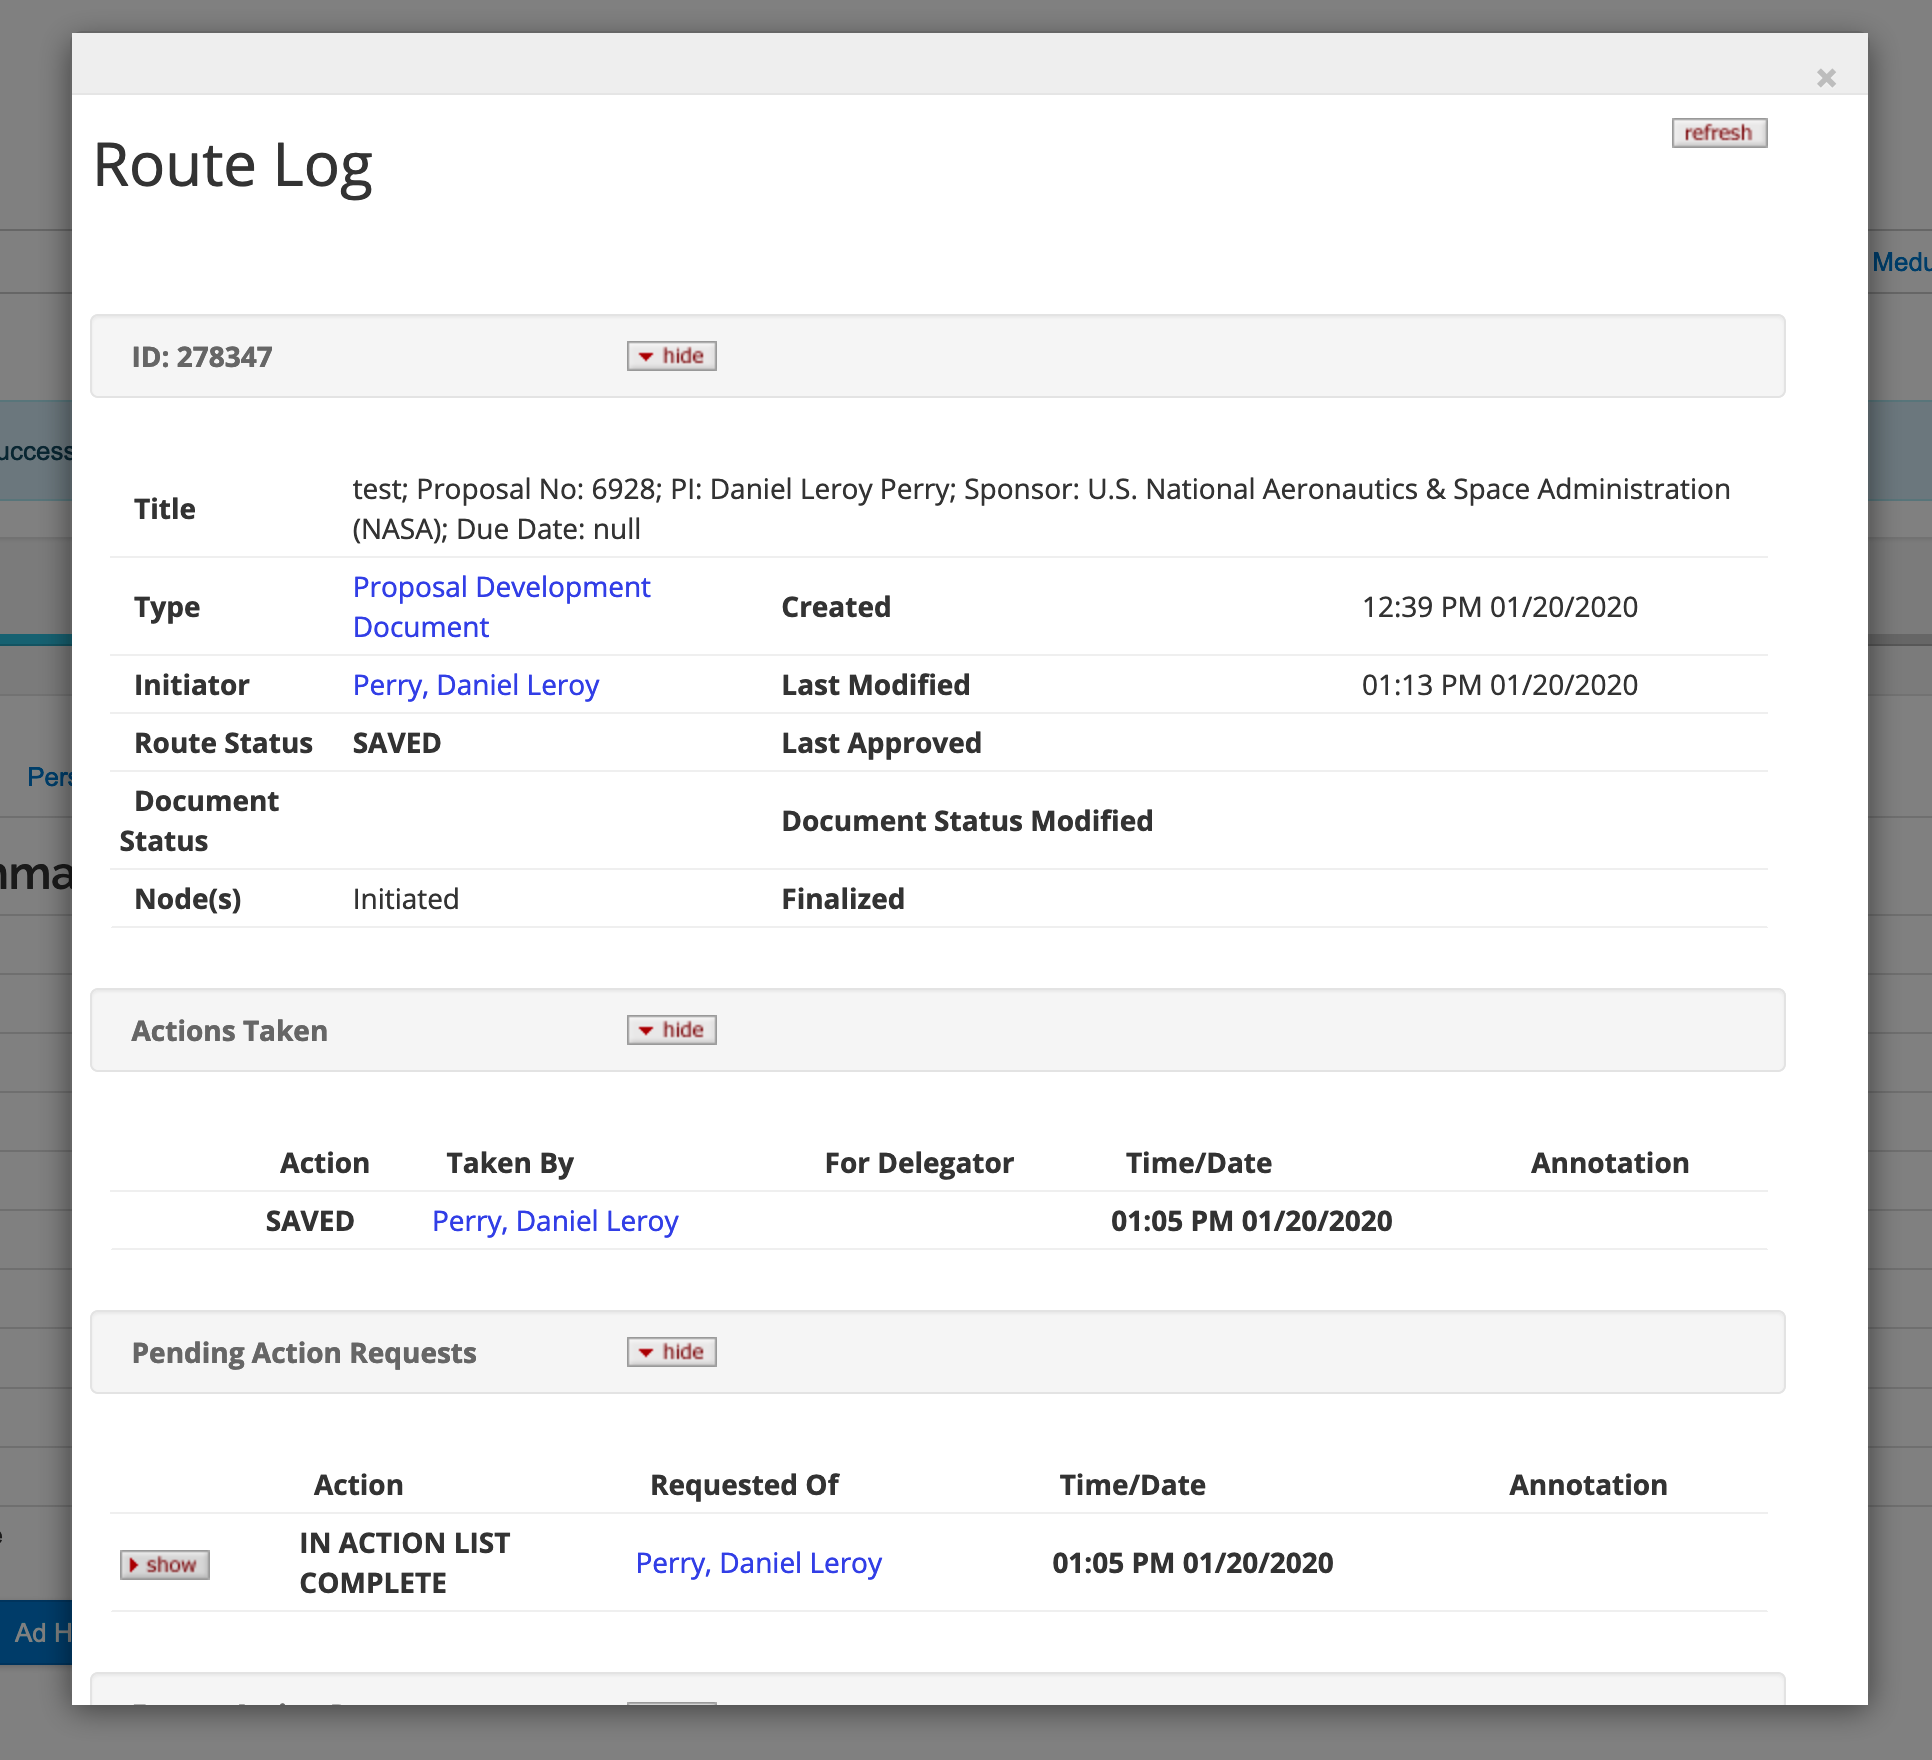
VIEW THE APPROVAL ROUTING
Click the ‘View Route Log’ link to view the routing status of the proposal.